-->

How to activate the split screen function on your Android

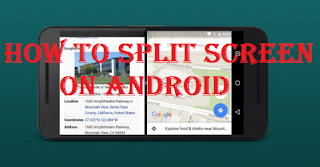
How to Split Screen on Android -  Among the wide range of functions available on Android, there is a very useful function called split screen, which allows us to use two applications simultaneously and independently on our smartphone. This means that you can check your social networks while watching YouTube videos or replying to emails and have the documents you need at your side.

Today, productivity is essential to get things done in the shortest time possible. This is the reason for the existence of multi-window or multi-monitor functions in many operating systems such as Windows. However, the importance of mobile devices and the duration of their use means that there are countless actions to be carried out from these smartphones and that is why Android includes a multiscreen function by default.
How to activate the split screen function on your Android

While the iPhone still doesn't allow you to use two apps at the same time (displaying both apps on the screen at the same time), Android has enabled this feature. Thanks to Android's multitasking feature, you can now use, view, interact, and do anything between any of the two open windows.

Also Read: How to Change Names on Android and iPhone Smartphones

That said, below we will explain in detail how to split the screen of the Android device and two applications at the same time.

How To Enable split screen on Android

Split screen is a feature available on all smartphones since Android 7.0 Nougat version. Although the procedure to activate it is slightly different depending on the brand of cell phone, the most common way to do it is as follows:

  1. The way to do this on Android is from the Recent Window. This part of Android is entered by clicking on the square  of icons that we all have at the bottom of the screen.
  2. At this point, click at the top of the screen, just above the application icon, and select Split Screen.
  3. This application is framed in the upper part of the screen and the lower part allows you to select another application to accompany the first application.
  4. This second application can be chosen from the ones we have open in the background, or it can be selected from the rest of the applications.
  5. After touching the desired application, it will be placed in the lower central part of the screen, keeping the application that we selected just above.

Now you will be using two applications at the same time, so each one occupies half, although we can highlight a little more the one we want by moving the black line between them, up or down.
There are some apps that are better suited to this split screen system than others. YouTube adapts very well to this system and even the video does not stop while we are watching it and in the end we do something else. But on the contrary, keyboard applications are not suitable for this system, because by occupying a part of the screen, many of them are out of what we can see.


Exit split screen mode on Android

If you no longer need this split screen mode, the way to exit the function is to press the Home button on your mobile phone. This will stop the two applications that we have divided and everything will go back to the way it was before said division.

Of course, on some cell phones, when you press this circle key, only the second application disappears and the first one remains on the same screen. So to make it disappear, just drag the selection down. This will turn it into a normal window and therefore after pressing Start it will go into the background like any other app.

Also Read: How to play split screen in Fortnite

How to Take Screenshots on Samsung Galaxy A31 quickly

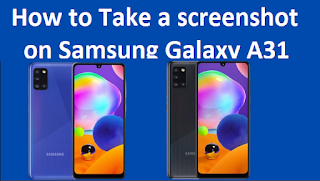
Screenshot samsung Galaxy A31 - Screen capture is something that has always been possible on mobile devices, which allows us to show something we are seeing at the moment and captured through high-quality photos on the screen, generally all mobile phones can take screenshots. However, today we will stop at explaining how to take a screenshot on the Samsung Galaxy A31.

How to Take a screenshot on Samsung Galaxy A31

On Samsung models there are several ways to take screenshots, so we will describe two native ones from the Android system on the Samsung Galaxy A31.

How to Take Screenshots on Samsung Galaxy A31 quickly

The first and most frequently used is sliding capture which for many people can be a bit tricky to do, because when trying to pass a hand across the screen it turns out to be carrying something else which causes it not to come out as we expected, Despite this, many of us use it. to take screenshots on Samsung A31 quickly.

Also Read: How To Screenshot on Samsung S10 [Easy & Fast]

For this we just need to slide the edge of the hand across the screen exactly where we want to capture the screen, anyway you can check this explanatory GIF on how to take a screenshot on Samsung Galaxy A31 by sliding.

But there is also another way to take a screenshot on the Samsung A31 which is to do it via a button, this is used with a key combination to run the "Screenshot" function.


How to Screenshot on Samsung A31

To take a screenshot on the A31 you have to press the volume down button and the power button at the same time quickly, the screen will flash automatically which means that the screenshot was taken correctly.

All screenshots are stored in the phone's internal memory, precisely stored in the DCIM folder and then in Screenshots sorted from oldest to newest.

Also Read: How to remove ads on Samsung Without Root [Work 100%]

Also remember there is another way to make screenshot on Samsung Galaxy A31 and that is through an app called “Easy Screen Capture” you can get it for free on Play Store but it also has great features, one of which is that it allows you to crop only what you want. you show from the screenshot.

How to prevent Android from deleting apps in the background

How To Keep An App Running In The Background Android - Battery life is very important, but some Android phones try too hard to stretch it. You may notice that the app is running poorly or that notifications are missing due to being deleted in the background. We'll show you how to stop it.

How to prevent Android from deleting apps in the background

Why does Android delete apps in the background?

Android makers have a choice. Allow free running apps in the background, which can hurt battery life, or remove background running apps they think you don't need. If your phone takes the latter approach, you may miss notifications for apps that are being uninstalled. Very annoying.

Also Read: How To change screen resolution on Samsung Galaxy S20 Ultra

This issue is so well documented that the "Don't Kill My App!" It was created by the app developer. They are sick of hearing complaints from users about their apps not working properly when the culprit is phone battery "optimization". This site ranks Android makers based on how badly they manage this. Samsung is one of the biggest offenders, while Google is one of the best.

How to stop Android delete apps in the background?

Don't kill my app! This website has specific instructions for different device manufacturers, but we'll show you a universal method that works on all of them. This method alone may not be enough to solve all your problems, but it is a good start.

  • First, swipe down once from the top of the screen and tap the gear icon.
  • Scroll down and find "Applications".
  • Then tap the three-dot menu icon and select "Special Access". If you don't see it, there will be a section on that screen titled "Special Access to Apps".
  • Now select "Optimize battery usage".
  • First, it will show all the apps that are not optimized. This application can run in the background. Tap the drop-down arrow next to "Non-Optimized Apps" and select "All".
  • Now you can find any app that is behaving improperly or has no notifications and turn off the toggle.

That's all! The app will no longer be "optimized", in other words, it will be removed in the background if you don't use it enough.

Also Read: How to remove ads on Samsung

There may be something else at stake here, but this method will work on all Android devices. Just find the problematic app and make sure it's not optimized.

How to disable pop-up notifications on Android Oreo 8 easily

How to disable pop-up notifications on Android Oreo 8 - Are you annoyed by pop-up notifications on Android Oreo home screen when you receive new notifications? Sometimes more app notifications will annoy you. You can disable or stop pop-up notifications on Android Oreo 8.0 and 8.1 devices individually.


In our daily life, we get more and more notifications from apps on the screen on our device. Different Android devices have slightly different settings to disable or disable pop-up notifications on Android devices. It will also block individual app notifications on Android 8.0 and 8.1 Oreo if notifications appear for certain apps.
 

How to disable pop-up notifications on Android Oreo 8 easily


Also Read: How to block text messages on iPhone


How to disable app pop-up notifications on Android Oreo 8.1 and 8.0

Step 1: Go to settings on Android 8.1 and 8.0 Oreo.
Step 2: Press Apps and Notifications.
Step 3: Press View all apps.
Step 4: Tap on any App you want to hide pop-up notifications.
Step 5: Press App Notifications.
An implicitly enabled pop-up notification, sound and vibration app on your Oreo device.
Step 6: Disable «All interrupts«.

Now when you get notification from app on your android device. You can't see pop-up notifications, anything vibrating, and sounds on your device. You will hide pop-up notifications from any app on your device, such as Facebook, WhatsApp, YouTube, Twitter, Instagram and more.

If you notice that some apps want to show a pop-up window first on the screen, you can set the app importance control as urgent in Android 8.1 Oreo using the following settings.

How to Hide or show app pop-up notifications on Android 8.1 Oreo

Settings > Apps & notifications > Notifications > App notifications > Tap the pop-up app on the screen > Tap any category > Important > Select Urgent

Now whenever you get a notification from this app, your device rings and appears on the screen. If you can't see any notifications on the screen or can't block app notifications on Android Oreo, follow the settings below.

How To Block WhatsApp notifications on Android Oreo 8.1 and 8.0

Settings > Apps and notifications > See all apps > Touch any app you want to block > App notifications > Disable "On"

And that's it. Was the above tutorial helpful for disabling app pop-up notifications on Android Oreo? If you have any problems, please leave them in the comment box below.
 

Also Read: How to remove ads on Samsung

How to change screen resolution on Samsung Galaxy S20 Ultra

How To change screen resolution on Samsung Galaxy S20 Ultra - By default, set the screen resolution of Samsung S20 Ultra FHD+ (2400 × 1080 pixels). However, the maximum screen resolution on the Galaxy S20 Ultra is WQHD+ (3200×1440). You can change screen resolution on galaxy S20 Ultra using display settings. Some running apps may stop when you change the resolution on your Samsung Galaxy device. Also, switch to the 120Hz refresh rate on the Samsung S20 Ultra using the display settings.

How to change screen resolution on Samsung Galaxy S20 Ultra

Samsung Galaxy S20 Ultra screen settings include Light/Dark Mode, Adaptive Brightness, Smooth Motion, Blue Light Filter, Font Size and Style, Screen Resolution, Full Screen Apps, Screen Expiration, and more. Follow the settings below to change the screen resolution on your Galaxy S20 Ultra, S20 Plus, and S20.


Also Read: How To Screenshot on Samsung S10

How To Change Samsung S20 Ultra screen resolution

Step 1: Swipe down the notification panel at the top of the screen and tap on the Settings cog icon.
Step 2: press Monitor.
Step 3: Tap Screen Resolution.
By default, set the resolution to 2400 × 1080 pixels.
Step 4: Choose from HD+ (1600×720) / FHD+ (2400×1080) / WQHD+ (3200×1440) and hit request.

How To Change Video Resolution on Galaxy S20 Ultra, S20 Plus, and S20: Record 8K Video

Step 1: Open the space app.
Step 2: tap on settings in the top left corner.
Step 3: Tap Rear Video Size (Rear Camera) in Video section.
Step 4: Select the rear size from 16:9 (8K) 7680 × 4320/16:9 UHD (60 fps) 3840 × 2160, UHD 3840 × 2160, FHD (60 fps) 1920 × 1080, FHD 1920 × 1080, HD 1280 × 720 / Full (2400 × 1080) / 1: 1 (1440 × 1440).
Step 5: Press Front Video Size.
Step 6: Choose from 16:9 UHD (60 fps) 3840 × 2160, UHD 3840 × 2160, FHD (60 fps) 1920 × 1080, FHD 1920 × 1080, HD 1280 × 720 / Full (2400 × 1080) / 1: 1 (1440 × 1440)

How To Change the camera aspect ratio on Galaxy S20 Ultra, S20 Plus and S20

Step 1: Open the Camera App.
Step 2: Tap Ratio (3:4) at the top of the screen.
Step 3: Choose from 3: 4/9:16/1:1 / Done.

And that's it. Hopefully this clearly shows how to change the screen resolution on a Galaxy S20 Ultra device. If you still have questions, let us know in the comment box below. Stay tuned and stay tuned for the latest updates. Also Read: How to remove ads on Samsung Without Root

Back To Top