-->

How to activate the split screen function on your Android

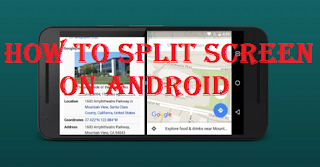
How to Split Screen on Android -  Among the wide range of functions available on Android, there is a very useful function called split screen, which allows us to use two applications simultaneously and independently on our smartphone. This means that you can check your social networks while watching YouTube videos or replying to emails and have the documents you need at your side.

Today, productivity is essential to get things done in the shortest time possible. This is the reason for the existence of multi-window or multi-monitor functions in many operating systems such as Windows. However, the importance of mobile devices and the duration of their use means that there are countless actions to be carried out from these smartphones and that is why Android includes a multiscreen function by default.
How to activate the split screen function on your Android

While the iPhone still doesn't allow you to use two apps at the same time (displaying both apps on the screen at the same time), Android has enabled this feature. Thanks to Android's multitasking feature, you can now use, view, interact, and do anything between any of the two open windows.

Also Read: How to Change Names on Android and iPhone Smartphones

That said, below we will explain in detail how to split the screen of the Android device and two applications at the same time.

How To Enable split screen on Android

Split screen is a feature available on all smartphones since Android 7.0 Nougat version. Although the procedure to activate it is slightly different depending on the brand of cell phone, the most common way to do it is as follows:

  1. The way to do this on Android is from the Recent Window. This part of Android is entered by clicking on the square  of icons that we all have at the bottom of the screen.
  2. At this point, click at the top of the screen, just above the application icon, and select Split Screen.
  3. This application is framed in the upper part of the screen and the lower part allows you to select another application to accompany the first application.
  4. This second application can be chosen from the ones we have open in the background, or it can be selected from the rest of the applications.
  5. After touching the desired application, it will be placed in the lower central part of the screen, keeping the application that we selected just above.

Now you will be using two applications at the same time, so each one occupies half, although we can highlight a little more the one we want by moving the black line between them, up or down.
There are some apps that are better suited to this split screen system than others. YouTube adapts very well to this system and even the video does not stop while we are watching it and in the end we do something else. But on the contrary, keyboard applications are not suitable for this system, because by occupying a part of the screen, many of them are out of what we can see.


Exit split screen mode on Android

If you no longer need this split screen mode, the way to exit the function is to press the Home button on your mobile phone. This will stop the two applications that we have divided and everything will go back to the way it was before said division.

Of course, on some cell phones, when you press this circle key, only the second application disappears and the first one remains on the same screen. So to make it disappear, just drag the selection down. This will turn it into a normal window and therefore after pressing Start it will go into the background like any other app.

Also Read: How to play split screen in Fortnite

How to Take Screenshots on Samsung Galaxy A31 quickly

Screenshot samsung Galaxy A31 - Screen capture is something that has always been possible on mobile devices, which allows us to show something we are seeing at the moment and captured through high-quality photos on the screen, generally all mobile phones can take screenshots. However, today we will stop at explaining how to take a screenshot on the Samsung Galaxy A31.

How to Take a screenshot on Samsung Galaxy A31

On Samsung models there are several ways to take screenshots, so we will describe two native ones from the Android system on the Samsung Galaxy A31.

How to Take Screenshots on Samsung Galaxy A31 quickly

The first and most frequently used is sliding capture which for many people can be a bit tricky to do, because when trying to pass a hand across the screen it turns out to be carrying something else which causes it not to come out as we expected, Despite this, many of us use it. to take screenshots on Samsung A31 quickly.

Also Read: How To Screenshot on Samsung S10 [Easy & Fast]

For this we just need to slide the edge of the hand across the screen exactly where we want to capture the screen, anyway you can check this explanatory GIF on how to take a screenshot on Samsung Galaxy A31 by sliding.

But there is also another way to take a screenshot on the Samsung A31 which is to do it via a button, this is used with a key combination to run the "Screenshot" function.


How to Screenshot on Samsung A31

To take a screenshot on the A31 you have to press the volume down button and the power button at the same time quickly, the screen will flash automatically which means that the screenshot was taken correctly.

All screenshots are stored in the phone's internal memory, precisely stored in the DCIM folder and then in Screenshots sorted from oldest to newest.

Also Read: How to remove ads on Samsung Without Root [Work 100%]

Also remember there is another way to make screenshot on Samsung Galaxy A31 and that is through an app called “Easy Screen Capture” you can get it for free on Play Store but it also has great features, one of which is that it allows you to crop only what you want. you show from the screenshot.

How to prevent Android from deleting apps in the background

How To Keep An App Running In The Background Android - Battery life is very important, but some Android phones try too hard to stretch it. You may notice that the app is running poorly or that notifications are missing due to being deleted in the background. We'll show you how to stop it.

How to prevent Android from deleting apps in the background

Why does Android delete apps in the background?

Android makers have a choice. Allow free running apps in the background, which can hurt battery life, or remove background running apps they think you don't need. If your phone takes the latter approach, you may miss notifications for apps that are being uninstalled. Very annoying.

Also Read: How To change screen resolution on Samsung Galaxy S20 Ultra

This issue is so well documented that the "Don't Kill My App!" It was created by the app developer. They are sick of hearing complaints from users about their apps not working properly when the culprit is phone battery "optimization". This site ranks Android makers based on how badly they manage this. Samsung is one of the biggest offenders, while Google is one of the best.

How to stop Android delete apps in the background?

Don't kill my app! This website has specific instructions for different device manufacturers, but we'll show you a universal method that works on all of them. This method alone may not be enough to solve all your problems, but it is a good start.

  • First, swipe down once from the top of the screen and tap the gear icon.
  • Scroll down and find "Applications".
  • Then tap the three-dot menu icon and select "Special Access". If you don't see it, there will be a section on that screen titled "Special Access to Apps".
  • Now select "Optimize battery usage".
  • First, it will show all the apps that are not optimized. This application can run in the background. Tap the drop-down arrow next to "Non-Optimized Apps" and select "All".
  • Now you can find any app that is behaving improperly or has no notifications and turn off the toggle.

That's all! The app will no longer be "optimized", in other words, it will be removed in the background if you don't use it enough.

Also Read: How to remove ads on Samsung

There may be something else at stake here, but this method will work on all Android devices. Just find the problematic app and make sure it's not optimized.

How to disable pop-up notifications on Android Oreo 8 easily

How to disable pop-up notifications on Android Oreo 8 - Are you annoyed by pop-up notifications on Android Oreo home screen when you receive new notifications? Sometimes more app notifications will annoy you. You can disable or stop pop-up notifications on Android Oreo 8.0 and 8.1 devices individually.


In our daily life, we get more and more notifications from apps on the screen on our device. Different Android devices have slightly different settings to disable or disable pop-up notifications on Android devices. It will also block individual app notifications on Android 8.0 and 8.1 Oreo if notifications appear for certain apps.
 

How to disable pop-up notifications on Android Oreo 8 easily


Also Read: How to block text messages on iPhone


How to disable app pop-up notifications on Android Oreo 8.1 and 8.0

Step 1: Go to settings on Android 8.1 and 8.0 Oreo.
Step 2: Press Apps and Notifications.
Step 3: Press View all apps.
Step 4: Tap on any App you want to hide pop-up notifications.
Step 5: Press App Notifications.
An implicitly enabled pop-up notification, sound and vibration app on your Oreo device.
Step 6: Disable «All interrupts«.

Now when you get notification from app on your android device. You can't see pop-up notifications, anything vibrating, and sounds on your device. You will hide pop-up notifications from any app on your device, such as Facebook, WhatsApp, YouTube, Twitter, Instagram and more.

If you notice that some apps want to show a pop-up window first on the screen, you can set the app importance control as urgent in Android 8.1 Oreo using the following settings.

How to Hide or show app pop-up notifications on Android 8.1 Oreo

Settings > Apps & notifications > Notifications > App notifications > Tap the pop-up app on the screen > Tap any category > Important > Select Urgent

Now whenever you get a notification from this app, your device rings and appears on the screen. If you can't see any notifications on the screen or can't block app notifications on Android Oreo, follow the settings below.

How To Block WhatsApp notifications on Android Oreo 8.1 and 8.0

Settings > Apps and notifications > See all apps > Touch any app you want to block > App notifications > Disable "On"

And that's it. Was the above tutorial helpful for disabling app pop-up notifications on Android Oreo? If you have any problems, please leave them in the comment box below.
 

Also Read: How to remove ads on Samsung

How to change screen resolution on Samsung Galaxy S20 Ultra

How To change screen resolution on Samsung Galaxy S20 Ultra - By default, set the screen resolution of Samsung S20 Ultra FHD+ (2400 × 1080 pixels). However, the maximum screen resolution on the Galaxy S20 Ultra is WQHD+ (3200×1440). You can change screen resolution on galaxy S20 Ultra using display settings. Some running apps may stop when you change the resolution on your Samsung Galaxy device. Also, switch to the 120Hz refresh rate on the Samsung S20 Ultra using the display settings.

How to change screen resolution on Samsung Galaxy S20 Ultra

Samsung Galaxy S20 Ultra screen settings include Light/Dark Mode, Adaptive Brightness, Smooth Motion, Blue Light Filter, Font Size and Style, Screen Resolution, Full Screen Apps, Screen Expiration, and more. Follow the settings below to change the screen resolution on your Galaxy S20 Ultra, S20 Plus, and S20.


Also Read: How To Screenshot on Samsung S10

How To Change Samsung S20 Ultra screen resolution

Step 1: Swipe down the notification panel at the top of the screen and tap on the Settings cog icon.
Step 2: press Monitor.
Step 3: Tap Screen Resolution.
By default, set the resolution to 2400 × 1080 pixels.
Step 4: Choose from HD+ (1600×720) / FHD+ (2400×1080) / WQHD+ (3200×1440) and hit request.

How To Change Video Resolution on Galaxy S20 Ultra, S20 Plus, and S20: Record 8K Video

Step 1: Open the space app.
Step 2: tap on settings in the top left corner.
Step 3: Tap Rear Video Size (Rear Camera) in Video section.
Step 4: Select the rear size from 16:9 (8K) 7680 × 4320/16:9 UHD (60 fps) 3840 × 2160, UHD 3840 × 2160, FHD (60 fps) 1920 × 1080, FHD 1920 × 1080, HD 1280 × 720 / Full (2400 × 1080) / 1: 1 (1440 × 1440).
Step 5: Press Front Video Size.
Step 6: Choose from 16:9 UHD (60 fps) 3840 × 2160, UHD 3840 × 2160, FHD (60 fps) 1920 × 1080, FHD 1920 × 1080, HD 1280 × 720 / Full (2400 × 1080) / 1: 1 (1440 × 1440)

How To Change the camera aspect ratio on Galaxy S20 Ultra, S20 Plus and S20

Step 1: Open the Camera App.
Step 2: Tap Ratio (3:4) at the top of the screen.
Step 3: Choose from 3: 4/9:16/1:1 / Done.

And that's it. Hopefully this clearly shows how to change the screen resolution on a Galaxy S20 Ultra device. If you still have questions, let us know in the comment box below. Stay tuned and stay tuned for the latest updates. Also Read: How to remove ads on Samsung Without Root

How to Enable and Use Smart Lock on Android 10

How To Enable Smart Lock on Android 10 - What is Google Smart Lock? Here's how to enable and use Smart Lock on Android 10. With Google's Android Smart Lock device, you can unlock your device automatically. Android 10's Smart Lock menu includes Body Detection, Trusted Places, and Trusted Device Voice Match. The Smart Face Lock feature has been removed from Android 10 devices. Google Pixel 4 and Pixel 4 XL devices come with us Face Unlock Security (Infrared Camera) using Project soli radar chip.

How to Enable and Use Smart Lock on Android 10

You can activate Samsung or Android smart lock if you don't want to use PIN code, Password, Pattern, or biometric security features. The smart lock function is less secure than pattern lock, PIN or password. Check out the steps to enable Smart Lock on Android 10 devices. Also Read: How to Change Names on Android and iPhone Smartphones

How to enable Smart Lock on Android 10 to unlock your phone automatically

You can unlock your phone automatically with this Google smart lock using the settings below.

  • Step 1: Swipe up from the home screen to open the file. app drawer.
  • Step 2: Tap on Application Settings.
  • Step 3: press Security.
  • Step 4: Tap Smart Lock in the device security section.

Please confirm your lock pattern or PIN or Password to continue the process. Given below Google Smart Lock Android 10 is available on Pixel or other compatible devices.

1. How to enable Smart Lock with Body detection
Keep the device unlocked while wearing it. Enable smart body detection to unlock your phone on the go, such as when holding or charging your device. Your device will be locked when it detects that it has been configured.

2. How to enable Smart Lock with Trusted places
You can add a location where you want to automatically unlock your phone. Make sure you have GPS enabled to access trusted sites.

3. How to enable Smart Lock with a reliable Device
Add your favorite devices to this list to unlock your phone when you're nearby. Add Smart Watch, Band and other Bluetooth devices.

4. How to enable Smart Lock with Voice matching
Set up Voice Match on Android 10 to access your assistant every time you say "Ok Google" even when the screen is off. Plus, use voice dialing to send messages and access email, calendar, contacts, and more when your phone is locked.


How to Disable Smart Lock on Android 10


If you don't want to use Smart Lock to unlock your device, just disable the Smart Lock option you want. If you want to completely disable smart lock on Android, just remove your device's lock screen security by following the steps below.
Settings > Security > Device security > Screen lock > Enter PIN or password or Pattern lock to change lock screen > Select Swipe or None > Touch Yes, delete

Now turn off Android 10 smart lock including fingerprint and other PIN, password or pattern lock.

How to Set your fingerprint on Android 10

You can add fingerprints on your Android 10 device using the data security settings below.

  • Step 1: Go to settings on Android 10.
  • Step 2: tap Security.
  • Step 3: Tap Pixel Footprint under Device Security.
  • Step 4: Tap Add Fingerprint.
  • Step 5: Place your finger on the sensor and lift it after feeling the vibration.
  • Step 6: Touch Done in the bottom right corner.


Also Read: How to Activate the Dark Mode of Google Chrome on Android

And that's it. We hope this has clearly shown you how to enable and use Smart Lock on Android 10. Still have questions about this tutorial? Let us know in the comment box below.

Sign out Netflix , How to sign out of Netflix on your Smart TV

How to sign out Netflix on Smart TV - It must have happened to you from wanting to close your Netflix session on Smart TV and believing that it will be easy, you have tried and you haven't found the option, huh!

Sign out Netflix , How to sign out of Netflix on your Smart TV

The technology is complex, but if you can handle platforms like Netflix from your computer, you know enough to handle other devices. Anyway, here I will show you how to sign out of Netflix from your Smart TV.
 

Also Read: How To Delete Spotify Account Easily Permanently

How To log out Netflix on Smart TV

For details, below, steps have been made on How to exit Netflix, so you just have to follow all the steps below
 

Step 1
Turn on your smart TV and press the button on the remote with the Smart option
Look for the Netflix icon and open the platform.

Step 2
When the app has started, you have to follow the pattern on the buttons on the remote to unlock the hidden settings.
This way you can easily log out.

Step 3
Press → → (Up, Up, Down, Down, Left, Right, Left, Right, Up, Up, Up, Up),
Be careful and follow the pattern well!

Step 4
At this point, the Netflix diagnostic panel will open, where you can exit without any problems.
Go to the last option - Close session - and click on it.

Step #5
Ready! Now you can open another new session.


When you know a little about technology, the rest is for you to develop. Now that you know how to log out of Netflix on your Smart TV or friends and family.


Also Read: How to record phone calls on iphone Without Using a Jailbreak

How to block annoying text messages on iPhone

How to block text messages on iPhone - Obviously spamming us is very annoying. Fortunately, it is possible to block text messages on iPhone and it is not something that is too complicated to achieve. In this article we will take a detailed look at all the options we have to permanently forget spam messages.

How To Block numbers that send us spam on iPhone

This method can also be used to block text messages from other contacts. You can block messages from friends, family members, etc. It's not just limited to spammers.

How to block annoying text messages on iPhone

We will open the number of the sender who sent us the message, for this we open a conversation and we have to press the number or name of the sender, a small menu will be displayed and we have to press the "Info" button.


Also Read: How to Use AirPlay Mirroring on iPhone, iPad and iPod Touch
 

Now we have to click on "Info" again and then at the bottom we will find "Block this person" in red.
This method is ideal when we receive too many spam SMS from the same phone number. This way, by simply blocking the sender, we will no longer receive any spam messages or calls from him.

How To Filter spam messages on iOS

The problem with spammers is that they generally don't use a single phone number. Therefore, we should continue to filter messages, this way we can try to prevent SMS from reaching us even if our number is not blocked. 

How to block annoying text messages on iPhone

We have to go to Settings > Messages > Unknown and Spam.

How to block annoying text messages on iPhone

Here we have to enable the option "Filter unknown senders". This option is for iPhone to save all messages from unknown senders in a separate list.

How To Use third party apps to filter spam SMS

We may also use third-party applications to filter spam messages. One of the best is Truecaller, available from the Apple Store. With this app we can avoid junk messages and forget the problem.

We will go to Settings > Messages > Unknown and Spam like we did before. We made sure to enable the Unknown Senders Filter option.

How to block annoying text messages on iPhone

After this, instead of putting "SMS Filter" we have to select "Truecaller".

Also Read: How to Share Notes with Notes Application from Iphone


And that's basically it. In this simple way we can block text messages on iPhone. We've focused the article on spam messages, but this method can be used to filter messages from contacts you have on your phone.

How to share notes with the Notes app from iOS or iPadOS

How to Share Notes with Notes Application from Iphone - Applications exist to make our life easier. There are apps of all kinds and the App Store is growing exponentially every day. However, Apple provides users with a number of native apps with iOS and iPadOS.

How to share notes with the Notes app from iOS or iPadOS

One of them is Notes, an application that not only allows us to quickly take notes, but with an update Apple has vitalized this application that allows us to perform many actions. For example: making lists, writing by hand, scanning documents, etc. This is a good tool to show something quickly and schematically. We teach you to share notes in this app so they can be edited by multiple people at the same time. Also read: How to close apps on iPhone 12 and iPhone 12 Pro


Also Read: How to screen record on iPhone (iOS 13/12/11/10/9 and earlier)

Edit notes between multiple users thanks to the Notes App on iOS and iPadOS


The Notes app is one of the most comprehensive tools for retrieving, forgiving redundancy, notes on iOS and iPadOS. Advances in artificial intelligence, the development of new products like the Apple Pencil and iCloud integration make it an essential app for storing small doses of information across all of our devices so it doesn't get lost.
 

However, sometimes we may want to share notes so we can edit them together with other users. There are various applications that can be used to do this, such as Apple Pages or Google Docs. However, the native Notes app allows you to share notes. To do this, it is necessary to follow the following steps in order

How To Share Notes with the Notes app from iOS or iPadOS

  • Launch the Notes app and open the one you want to share.
  • At the top right there are three dots (in case of iPad) or globe with user icon (on iPhone). In the case of the iPad, we press and the menu is displayed. We click Add people.
  • The new displayed menu allows us to send invitations to participate from any place compatible with the iOS Sharing function. In my case, for example, I can do it with Messages, Slack or Gmail.
  • Before sending the invitation, it is necessary to specify in the Options menu for Sharing how we want user permissions. We have two options: users can make changes or they can only read notes.
  • Once the option is selected, we select the contact or email with whom we want to share the note and press to send.


Also Read: How to record phone calls on iphone Without Using a Jailbreak
 

Immediately, the user or contact will accept the invitation. The note will be added to your sidebar in the Notes app and you can read or edit it depending on the option selected. Now a new icon will appear with the user where we can see more specifically who has access to the record and what their permissions are. We can also highlight changes or hide warnings apart from changing permissions directly from this new menu. Also read: How to Scan Documents with the Notes Application on iPhone and Ipad

How to screen record on iPhone (iOS 13/12/11/10/9 and earlier)

How to screen record on iphone -  If you can't explain what happens on your iPhone, you can record your iPhone screen as a video. In addition, you can screen on YouTube to record YouTube videos, gameplay, video calls, online meetings and any other activities with sound. There are many reasons to record screen videos on the iPhone.

How to screen record on iPhone (iOS 13/12/11/10/9 and earlier)

How to record screen on iOS 11 and later


If you use iPhone 8, iPhone 8 Plus, iPhone X, iPhone XR, iPhone XS, iPhone XS Max, iPhone11, iPhone Pro or iPhone 11 Pro Max, you can use the iOS 11 screen recording function directly. Because those iOS devices are released later than the iOS 11 update. In other words, you can record on iPhone 8 and later with the built-in iOS screen recorder.

To record screens on the iPhone 7 and earlier models, you need to check which iOS version you currently use. Currently you can create a screen recording on iOS 11 and later versions.

1: Add Screen Recording in Control Center
Open the Adjustments app. Choose the Adjustment app within the Control Center iPhone. Customize the tap control to access all options. Then tap on the green + first icon screen recording. This means that the iOS screen recording feature has moved to include more control than the section.

2: Access iPhone Control Center

Navigate to the page you want to record. For iPhone 8 and earlier users, scroll to the Control Center menu. If you use iPhone X or later devices, you can pull down the Control Center menu from the top right corner instead.

3: Do not enable disturbances
If you want to record screen on iPhone without popup or other annoying issues. You had better switch on Do not disturb to temporarily turn off all notifications. You can tap on the Crescent Moon icon and specify more details.

4: Record iPhone Screen with Sound

Deeply press the Document Documents button. Choose to record screen on iPhone with microphone audio. Now tap Start recording to record app screen or video on iPhone. A countdown timer pops up. Later, the iPhone will automatically start recording video of your iPhone's screen.

5: Stop Recording Screen on iPhone
When you want to stop recording on the iPhone, you can swipe up or down to get to it Control Center. Tap the Record button to stop the screen record on the iPhone without the red bar. But when you record online streaming video from YouTube and more, you can also tap on the red bar at the top of your iPhone screen. Stop tap tap Stop screen recording as stated in the pop-up dialog. Recorded iPhone screen videos will be saved in the Photos app by default.


Also read : How to record phone calls on iphone Without Using a Jailbreak 

How To Record screen on iOS 10 and earlier

There are still many people who do not want to update iOS 11. During this time, you can record on the iPhone with third-party applications. For example, you can use the Screen Recorder app to record screens on iOS 10. Or you can emulate or mirror the iPhone screen on your computer for screen recording. Whatever it is, you can record iOS 10 with audio on iPhone in 3 different ways below.

How To Record on iOS 10 with screen recorder app
It is difficult to tell which is the best screen recorder app for iPhone. Because you can choose from many apps, such as Record It !, Go Record, Airshow Screen Recorder, DU Recorder, BB Recording Screen Recorder, etc. Not all of them are free to use iPhone screen recorder. What's more, you need to check already supported devices.

To record the screen on the iPhone without a jailbreak, this section will take the AirShou screen recorder as an example. You can also record games, applications and videos on iOS 10/9 with other devices depending on your preference.

  • Free download and install AirShou Screen Recorder on your iPhone. To find the download link you have to go to iEmulators.
  • Adjustment to unscrew and head device management. Please trust AirShou for further iOS 10 screen recording.
  • Return to the AirShou screen. Tap toti record and customize iOS recording settings including filename, orientation and resolution.
  • Choose Advertisement Next step follow its on-screen instructions. Swipe up from the bottom of the iPhone screen. Start airplay mirroring and then select AirShou.
  • Now you can record on devices running iPhone 7 and earlier iOS 10.
  • Tap Tap Toti to complete the iPhone screen recording process.

How to screenshot Redmi Note 9, Note 9 Pro and Note 9S


Screenshot of Redmi Note 9, Note 9 Pro and Note 9S - Redmi Note 9, Redmi Note 9 Pro and Redmi Note 9S are smartphones launched by Xiaomi together in June 2020. Because it includes a newly launched cellphone, of course many are curious about various its features, one of which is how to screenshot.
How to screenshot Redmi Note 9, Note 9 Pro and Note 9S

Take a picture on the screen and save it as a form of photo file in the gallery that we often do. Because it can be used as documentation and share it to social media services, such as Facebook, WhatsApp, Instagram and other social media. While the feature screenshot functions on the Redmi Note 9 smartphone and Note 9 Pro series are the same as other types of Android phones.

If you just have a Xiaomi Redmi Note 9 phone, you will definitely feel confused how to do screenshots on this smartphone. Yes Screenshots on smartphones are very easy for us to save files. Even screenshots on this smartphone can be done even though there are a number of pages extending to the bottom, the long screenshot feature on Redmi Note 9 phones can do it easily.


Here's how to screen-capture or capture the display on the Redmi Note 9 screen or type Note 9 Pro in a variety of easy ways to do.

How to screenshot Redmi Note 9, Note 9 Pro and Note 9S

And we all know that Xiaomi is always better in terms of customization. So this time we have summarized 3 ways to take screenshots on your favorite Xiaomi device.  All the methods we provide can work on All Xiaomi Phones, whatever type you use such as Redmi 1S, Redmi 2 / Prime, Redmi 3S / Prime, Redmi note 3, Note 4G, Mi 2, Mi 3, Mi 4, Mi 4i , Mi 5, Redmi Note 8, Redmi Note 8 Pro, Redmi Note 9, Redmi Note 9 Pro and others.

1. Screenshot Using Buttons (Hardware Buttons)

The steps are as follows:
  • Choose which part you want to screenshot
  • Look for the volume down button and the menu key button
  • Then press both at the same time until you hear 'tick'
  • The screen will flash that says the screenshot or screenshot was successful
  • Open the gallery to make sure the screenshot is saved.

2. Screenshot Using the Screenshot Button

The next way is to press the screen capture icon on the Mobile Redmi Note 9. And the following way.
  • Determine the display you want to capture (Capture)
  • Then open the top toolbar, how to swipe down the screen using one finger
  • Look for the screenshot button, if it doesn't appear again slide it twice to open the other buttons
  • Tap the screenshot button icon to take a screen shot.

3. Screenshot Using Menu Options

Screenshot using the menu option is a simple method but not all Android smartphones have it other than Xiaomi. Xiaomi has 2 ways to take screenshots.
The steps are as follows:
  • Choose which part you want to screenshot (screenshot)
  • Next drag the Notification bar from top to bottom and find it toggles.
  • Then look for the Screenshot icon, then tap
  • Voila !!! The selected screen is saved in the gallery

4. Three Finger Screenshoot Screen

Here is a faster way than before, the movement features on the Redmi Note 9 cell phone just by rubbing three fingers. And the way is as below. But you have to activate this menu first, but by default this menu has been activated.
  • Position the content on the screen where you want to take a picture
  • Then place the three fingers firmly in the position of the top screen, then swipe down
  • If the screen appears to flicker or you hear a sound like a camera shot, a sign that the screenshot was successful
  • As usual the screenshot can be seen in the gallery.


Some ways to screenshot above can also be done on most Xiaomi smartphones, such as Redmi Note 8 / Pro, Redmi Note 9, Redmi Note 9 Pro, Redmi Note 9S and other types of Xiaomi smartphones.
 

How to Change Font Realme 6 and 6 Pro [Easy &Fast]


How To Change Font Realme 6 and 6 Pro - Realme 6 and 6 Pro are officially released to the market, but Realme still does not feature the font change feature in the Android 10-based UI realme system on its device. If you pay attention, the appearance of the UI Realme interface has a Simplicity concept. Interestingly, each icon consists of no more three colors, giving rise to a simple but beautiful impression.

How to Change Font Realme 6 and 6 Pro [Easy &Fast]

In addition, the UI realm developers present several interesting features and various utilities compared to the Android system in general, except for the font change feature. Through the official forum, there is no certainty from the Realme when it will feature the font change feature in the next system update. But one of the moderators at the Realme forum provided a solution that could be tried while waiting for the feature to be officially present. Here's how to change the Realme 6 and 6 Pro fonts in full.

How To Change Font Style In Realme 6 and 6 Pro [Easy]
  • Prepare the font that you want to use first, you can download it from DaFont.com.
  • Then download the OFont Indonesia application and the APK Editor and install it on your Realme device.
  • After the application is installed, change the region to Myanmar (Required), then adjust the time zone to each region. *
  • Open the APK Editor application, select the Select Apk From App option
  • Then search and select OFont Indonesia then select the Simple Edit (FILE REPLACEMENT) option
  • From that page, enter the assets folder then open the fonts folder
  • Tap the edit menu next to the zawgyitai.ttf file
  • Then look for fonts that have been downloaded previously
  • Finally press the save button next to the edit button
  • Wait a few moments, and do not immediately close the APK Editor if the process is complete.
  • Now open Device Settings and enter Application Management
  • Search OFont Indonesia and select Delete
  • Open the APK Editor again, then tap the Install button and follow the steps described.
  • If so, open Settings one more time and enter the Screen & Brightness section, then activate Support Dai Characters.


To change regions, go to Settings → select Language and Region → enter the Regions section. Meanwhile, to change the time zone, please open Settings → enter Additional Settings → select Date and time.

That was the way to change the font Realme 6 and 6 Pro. You can also apply this method to all other types of HP Realme.

How To Screenshot on Samsung S10 [Easy & Fast]


Screenshot on Samsung S10 - Hello to meet again with admin Mummetechno who on this occasion the admin will discuss about how to be able to do screenshots on Samsung S10

How To Screenshot on Samsung S10 [Easy & Fast]

Samsung S10 is a new variant of Samsung and is already loaded with various advanced features and hardware. But all of that will feel useless if we can not do screenshots on Samsung S10, therefore below the admin has made steps about how to do a screenshot on Samsung Galaxy S10


How To Screenshot on Samsung Galaxy S10 and S10 +
  1. Please just press and hold the combination of the volume down button + power button simultaneously.
  2. You will hear the sound of 'Click' and there is a vibration that you feel on the device, then you will see a screenshot displayed on the screen
After that you can choose a few other features to edit the Samsung S10 screenshot:
  • View Screenshot: to see the screenshot
  • Scroll Capture: If you want to take a whole screenshot from the screen
  • Draw: Edit the screenshot
  • Share: Can be shared with friends as a status on social media


That's an easy way to do screenshots of Samsung Galaxy S10 and S10 + that you can use according to your desired needs.

Screenshot Samsung J2 | How To Screenshot Samsung J2 Easily and Quickly [Work 100%]


Screenshot Samsung J2 - On this good opportunity, we will try to discuss about how the Samsung J2 screenshot can be said to be quite difficult for users or owners of this smartphone, because it is not yet familiar with some of the features it has.

Screenshot Samsung J2 | How To Screenshot Samsung J2 Easily and Quickly [Work 100%]


Samsung J2 is also very supportive for your photography activities because J2 has been given a rear camera that has a 5MP camera resolution and a front camera of 2MP. Samsung also stated that Samsung J2 is able to meet the intake of selfie needs of each user. With a good camera, it feels incomplete if you can't do screenshots. therefore under this admin will provide a tutorial on How to Screenshot Samsung J2 Easily and Quickly

How To Screenshot Samsung J2 Easily and Quickly [Work 100%]
  1. The first thing you should fight for is to turn on the Samsung Galaxy J2 first.
  2. Open the display that you want to screenshot.
  3. After that, press the Power + Home button simultaneously.
  4. It can be said to be successful when the screen flickers which indicates a screenshot has occurred on the screen.
  5. Then a notification will appear about the screenshot image showing the results of the screenshot.


That's a brief review of How to Screenshot Samsung J2 Easily and Quickly [Work 100%], I hope this post will benefit you, thank you

Samsung A70 screenshot | How to screenshot Samsung A70 to screen capture Samsung A70

Screenshot samsung a70 - In this post the admin will explain about one of the important features in the Samsung A70 which is the screenshot feature. When we have a Samsung A70 smartphone, it certainly won't be complete if we can't use the screenshot feature. Therefore, in this post the admin will share tricks with you about how to screenshot Samsung A70


If you are curious about how to screenshot Samsung A70, then please refer to the tutorial below to finish
Samsung A70 screenshot | How to screenshot Samsung A70 to screen capture Samsung A70


How To Screenshot Samsung A70

1. How to screenshot Samsung Galaxy A70 with a physical key combination
  • The first thing you do is determine the area that you will screenshot.
  • After you determine the area for this screenshot, you can press the power and volume down buttons simultaneously for a few moments.
  • If you hear the shutter sound and the screen has blinked, then the screenshot you did was successful and you can release the two buttons.
  • The screenshot that you do will appear on the notification menu or you can see it through the default gallery application ..


2. How to screenshot Samsung Galaxy A70 Using Palm Swipe Gesture

  • The first thing you do is open the settings menu.
  • After entering the settings menu or settings, you can choose Advanced Features.
  • On the Advanced Feature page, you only need to choose Motion and Gesture.
  • Then you can activate the Palm Swipe to Capture feature.
  • After all the features have been activated, you just need to find the area that you want to screenshot.
  • After you find the part that you want to screenshot, you only need to close your fingers by forming like a knife and immediately sweep or swipe the screen from right to left.
  • If the smartphone makes a shutter sound or the screen flashes, then your screenshot has been successful.
  • You can see the screenshot through notification or open the gallery application provided by Samsung Galaxy A70.


That's the explanation from the admin about How to screenshot Samsung A70, hopefully this post is useful for you, thank you

How to Change Names on Android and iPhone Smartphones

How to Change Names on Android and iPhone Smartphones - Actually, your smartphone has a name, you know! When you buy a new smartphone either Android or iPhone and other mobile devices, the gadget will have a factory default name (usually, in accordance with the serial name).

The name on the smartphone was quite important, especially to distinguish between your device and someone else's when you need to connect with other devices be it a smartphone or laptop.

How to Change Names on Android and iPhone Smartphones

For example, when your smartphone is connected to a PC or Mac laptop using a cable the smartphone name will appear.

If you have more than one device and need to differentiate between one device and another, it seems like giving a name to the smartphone as you wish can be a good solution.

Each smartphone usually has its own way to give it a name as you wish. Here's how to Easily Change the Name of Android and iPhone Smartphones

How to change the name of the iPhone

The default name for an iPhone device is iPhone. So you can imagine if you have more than one iPhone, or at home there are also many who have an iPhone, if you haven't changed the name it will be difficult to distinguish between iPhones from one another.

And one more thing, to use features on the iPhone such as Find My and iCloud, we must identify based on the name and we must be able to distinguish which iPhone to use.
How to Change Names on Android and iPhone Smartphones


Changing the name of the iPhone is very easy and simple. The example is done using iOS 13 and can usually be done for various iPhones with other iOS versions.

  • On your iPhone, go to Settings> General, then click "About".
  • Click the first line on the "About" menu that will bring up the iPhone's device name.
  • Then rename the iPhone as you wish, then click "Done".


How to Change the Android Name

Changing the name on Android is somewhat more varied, because it is adapted to the smartphone series and Android operating system used.

The most common way of various versions of Android is through the "Settings" / "Settings" menu. For example on the Android OS version 9, which may be similar to other smartphone versions.

  • Go to Settings> General> About Phone> Phone Name
  • Then click the name of the smartphone that appears
  • Then rename Android as desired, finished.

How to Change Names on Android and iPhone Smartphones


There are also several versions of Android smartphones that do not provide "Phone Name" in the Settings menu> General> About Phone> Phone Name.

Also Read: How to prevent Android from deleting apps in the background


You can do this by changing the name on Bluetooth, usually this will also change the name of your Android smartphone. Good luck!

How To Delete Apps from Your Apple Watch

How To Delete Apps from Your Apple Watch - If you have installed many applications on your Apple Watch, the Home screen might get a little crowded. Want to know how you can delete rarely used applications from your watch? There are two ways to do it.

How To Delete Apps from Your Apple Watch

One way to delete an application is directly on the Home screen of your watch. Tap the digital crown to access the Home screen and drag your finger around the screen until you find the icon for the application you want to delete. Tap and hold lightly (not firmly) on the icon.
How To Delete Apps from Your Apple Watch

The Home screen enters editing mode. All applications that can be removed will have a small "x" button at the top left of the icon. Tap the "x" button on the application icon that you want to delete. There are a number of default applications on the watch that cannot be deleted, such as Settings, Maps, Weather, Alarms, Timer, and Stopwatch and the Time icon that takes you back to the watch face.
How To Delete Apps from Your Apple Watch

 
A confirmation message appears asking if you are sure you want to delete the selected application. Tap "Remove Application". Note that the application is not deleted from your iPhone, only from your watch.
How To Delete Apps from Your Apple Watch

The application is deleted, but the application icon remains in editing mode. Tap the "x" button on other applications you want to delete or press the digital crown to return to normal mode.

The application icon is not reset automatically to fill the gap left by the deleted application. However, you can fix this by resetting the application icon on the Home screen to whatever shape or layout you want.

If you find it difficult to tap the little "x" button on the Home screen application icon to delete it, you can delete the application from your watch using the Watch application on your iPhone. To do this, tap the "Watch" application icon on your phone's Home screen.

Make sure the My Watch screen is active. If not, tap the "My Watch" icon at the bottom of the screen.
Scroll through the list of applications on the My Watches screen until you find the application you want to delete from the watch and tap.

When the application is on your watch, the "Show Applications on Apple Watch" slider is green and is on the right. Tap the button to delete the application from your watch.
 

A message is displayed temporarily when the application is uninstalled and the slider button moves to the left and turns black.

If you want to reinstall the application that you deleted, you must use the Watch application on your mobile. You cannot install the application directly on your watch.

How To Activate Dark Mode on Smartphone Realme [Work]

How To Activate Dark Mode on Smartphone Realme [Work] - Interesting news for you smartphone users. Recently, the Dark Mode feature has been present in a variety of devices created by the realm, from the X realm, the 5 Pro realm, the C2 realm, the U1 realm, to the 3 Pro realm.

How To Activate Dark Mode on Smartphone Realme [Work]

If you don't know, Dark Mode is a feature that will change the theme of the interface to dark with black domination, making it more comfortable for the eyes especially when you are in a dark place or at night.
 

How To Activate Dark Mode on Smartphone Realme [Work]

How do you activate Dark Mode on a smartphone realm? consider the following easy steps:

1. Make sure your smartphone realm (X reality, Real 5 Pro, C2 Real, U1 Real, and Real 3 Pro) has the latest operating system update. On the device that we use, namely Realme 3 Pro, the updates we receive are like this:
How To Activate Dark Mode on Smartphone Realme [Work]

As seen in the explanation, this latest ColorOS 6 update not only brings the Dark Mode feature, but also the Android Security Patch Update, switches to switch between SIMs, and a more optimized gaming experience.

2. After the update is complete, to activate Dark Mode you can go directly to the Settings alias Settings. 
How To Activate Dark Mode on Smartphone Realme [Work]
3. Scroll down until you find the Lab realm, then click.

4. Activate Dark Mode. 
How To Activate Dark Mode on Smartphone Realme [Work]

5. Interestingly, you can choose any third party application that you want to display in Dark Mode. For example Instagram, Facebook, WhatsApp, and so on. Just decide which one is more comfortable to use with Dark Mode and which are not. 
How To Activate Dark Mode on Smartphone Realme [Work]


What about other smartphone realms?

Dont worry. The realm has ensured that the Dark Mode update feature will not only be available in realm X, realm 5 Pro, realm C2, realm U1, and realm 3 Pro only. Other series such as realism 3 / 3i, Real 2 Pro, Real 2, Real C1 and Real 5 are promised to get similar updates before the end of 2019.

How To Save iOS 9 Battery Without Application

How To Save iOS 9 Battery without Application - For those of you iPhone users who have made improvements or already use iOS Version 9 is the right step. because in addition to the problematic bugs that have been fixed and also a fresher look, it turns out to have other advantages, namely to make your iPhone battery can last longer, because it added features Low Power Mode.

How To Save iOS 9 Battery Without Application


but what's interesting is that not only that feature is provided to save battery. there are 5 ways you must know in terms of saving power on iOS 9 which certainly makes your battery last longer in operation. For how, please see below:

1. Activate Low Power Mode
How To Save iOS 9 Battery Without Application

Apple has tested battery endurance that can last more than 1 hour on an iPhone that uses iOS version 9. This is because of the Low Power Mode feature and this can last when the iPhone is in a low battery. To activate this feature please open the Settings Menu -> General -> Battery -> Low Power Mode.

2. Look for applications that consume a lot of battery power
How To Save iOS 9 Battery Without Application

Users looking for applications that consume a lot of iPhine battery power, to find and see it, please open the Settings Menu -> General -> Battery. in the menu will display a number of power presentations that are spent from the application. If you have found which application consumes the most iPhone battery power, so when the iPhone is LowBat users can turn off or not use the application.

3. Turn off Bluetooth when not in use

It is recommended to turn on the Bluetooth feature when you are not using it, because Bluetooth can consume a lot of battery power even if the user does not use it. if you activate it continuously automatically it still works in finding a device to be paired, this is the reason why Bluetooth can consume battery power even when not in use.

4. Optimize Accessibility settings
How To Save iOS 9 Battery Without Application

In the Accessibility Options section contained in the Settings menu will display many settings that users can change in maximizing iPhone battery power saving. one thing you can do is to change the screen display to a colorless alias alias Grayscale
Select General -> Accessibility, then activate Grayscale, after iPhone users activate this feature the iPhone will appear Black and White.


5. Don't use Live Photos as wallpaper

for those of you iPhone 6S and 6 Plus users, you should already know about the new features, Live Photos. but the drawback of this feature is that it can use up your iPhone battery, especially if it's used as a wallpaper. So it is recommended not to use the Live Photos feature so that users can use the iPhone for longer or more economical.

How To Screen Record on iPhone 11, iPhone 11 Pro, 11 Pro Max

How To Screen Record on iPhone 11, iPhone 11 Pro, 11 Pro Max - In certain very important situations there are times when you have to record your iPhone or iPad screen as important evidence. Right now Apple's latest iPhone 11 is already packaged and equipped with more sophisticated features, and users might just want to record these features to later be shown to others. Therefore recording the iPhone screen now has significant value.

How To Screen Record on iPhone 11, iPhone 11 Pro, 11 Pro Max

In this post the admin will share about how to record the screen on the iPhone 11 Pro Max, 11 Pro, and iPhone 11. To do this the process is actually quite simple, but before you actually start recording your iOS screen, you must first activate the feature This is from the Control Center of your device, after the feature is activated then you just turn on the microphone. For more clarity, please refer to the following review
 

How to Record Screens on iPhone 11, iphone 11 Pro and 11 Pro Max

As the admin mentioned above that the first time you have to add a screen recorder to the iPhone Control Center. To add a screen recorder to the Control Center then follow the steps:
  • Step 1. Tap the Settings application on your iPhone
  • Step 2. Next, you please tap on the Control Center under General.
  • Step 3. Now all you have to do is tap on Customize Control.
  • Step 4. Here, you will see the controls and you can quickly access them from Today Today from your iPhone. Now all you have to do is scroll down and find the Screen Recording control under the MORE CONTROLS section.
  • Step 5. Please Tap the green ‘plus tombol button, which appears before Screen Recording

Please Control Screen Recording is now pushed above, and you can see it under the INCLUDE section.

After the screen recording feature is activated, the next step is to record your iPhone screen.
  • Step 1. Please move the screen down from the top right corner to bring down the Control Center so that it appears.
  • Step 2. There are several controls that appear, and there you can see the Screen Recording icon.
  • Step 3. Please long press the icon. so that later two options will appear: Screen Recording and Microphone Off. This means that your iPhone microphone is turned off, so you have to turn it on to be able to record the screen completely. please Tap the Microphone icon then tap Start Recording.

You will see the countdown begin, and the feature will begin the process of recording your device's screen after three seconds.


When recording is complete, and To stop recording you must tap the time from the upper left corner of your device. From the pop-up, please tap the Stop button to stop screen recording, and automatically your recorded screen video will later be saved to the Photos application on your iPhone.

That's the tutorial that the admin can share about How to Record Screens on iPhone 11, iPhone 11 Pro, 11 Pro Max, hopefully this post can be understood, Thank you.
Back To Top